
Uploading content is more than clicking a button. It is a repeatable system that turns each piece of media into discoverable, trustworthy, and monetizable content. The steps below are the exact upload workflow and settings that consistently increase reach, protect channels from spam filters, and maximize both search and browse opportunities. This guide is written for small businesses and nonprofits that want predictable growth without guesswork.
Why the upload process matters
Most creators treat upload as an administrative task. That is a mistake. The way you name files, craft titles, place links in the description, and choose settings influences how the platform categorizes your content, who sees it, and whether the algorithm trusts your channel.
Think about this like preparing a storefront. Garbage in, garbage out. If you help the platform understand your content, it’s more likely to show it to the right people. For small organizations, that can mean better organic reach, more email signups, more donors, more customers, or more volunteers with the same amount of work.
Upload checklist (pre-flight)
- Video file name: Set the MP4 (or MOV) file name to the intended title, exactly or very close. This small consistency helps categorization during early hours.
- Thumbnail file name: Save the thumbnail image using the same title text as the file name.
- Title: Write a Moneyball-friendly title: SEO keyword up front, clear value, short and clickable.
- Description: Write an above-the-fold, SEO-friendly summary and place your primary link within the first lines so it appears without clicking more.
- UTM link: Create a dated UTM using a shortener like short.io to track which uploads drive conversions.
- Playlists: Pick two or three relevant playlists that a viewer would logically binge from.
- End screen: Pre-plan which related content you’ll point viewers to and build the end screen before publishing.
Step 1 — Naming the file and thumbnail (it’s intentional)
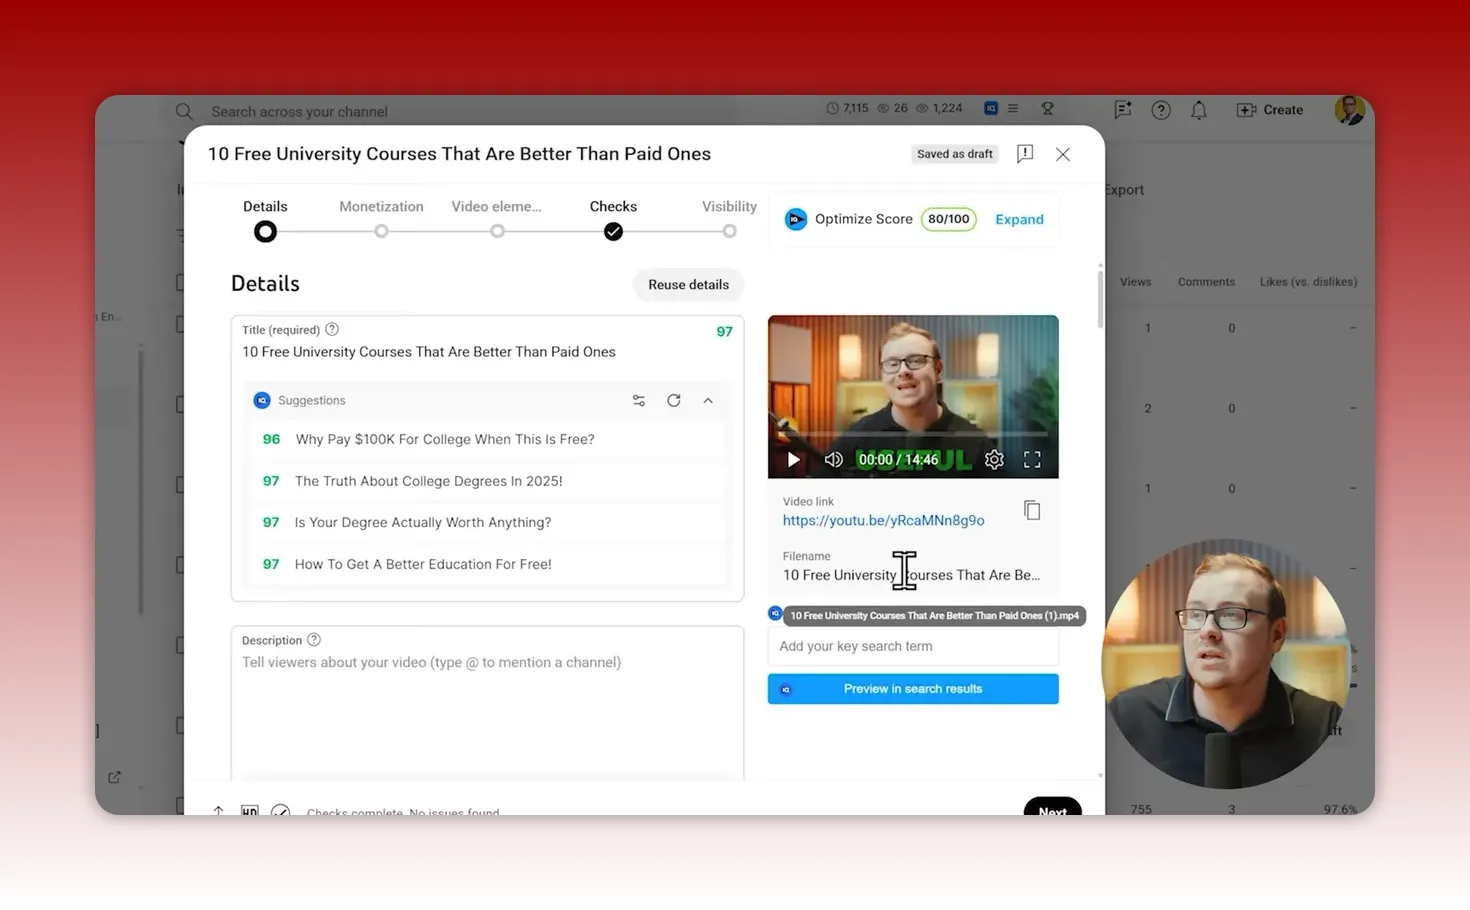
Name the video file the same as the final title and do the same for the thumbnail image. There is no ironclad proof that these two simple steps move the algorithm, but many creators report better early categorization and fewer “spam” flags when metadata is consistent. For small organizations that rely on organic discovery, consistency reduces noise in the platform’s classification process.
Step 2 — Title strategy: the Moneyball method
Your title must do two things at once: be SEO friendly and be clickable. That doubles your chances of being discovered via search and via browse (home feed and recommendations).
Rules for a high-performing title
- Put the main keyword within the first five words.
- Keep the title short enough to read at a glance but descriptive enough to be relevant.
- Make it conversational when appropriate — “Most useless degrees…” feels like a warning from a friend and increases curiosity.
- Use punctuation deliberately. Ellipses or lowercase can convey tone and increase clicks for some audiences.
Examples of Moneyball titles for small orgs:
- Free digital marketing tools for nonprofits
- Volunteer recruitment tips that actually work
- Grant writing basics: what to avoid
Step 3 — Description and the “above the fold” link
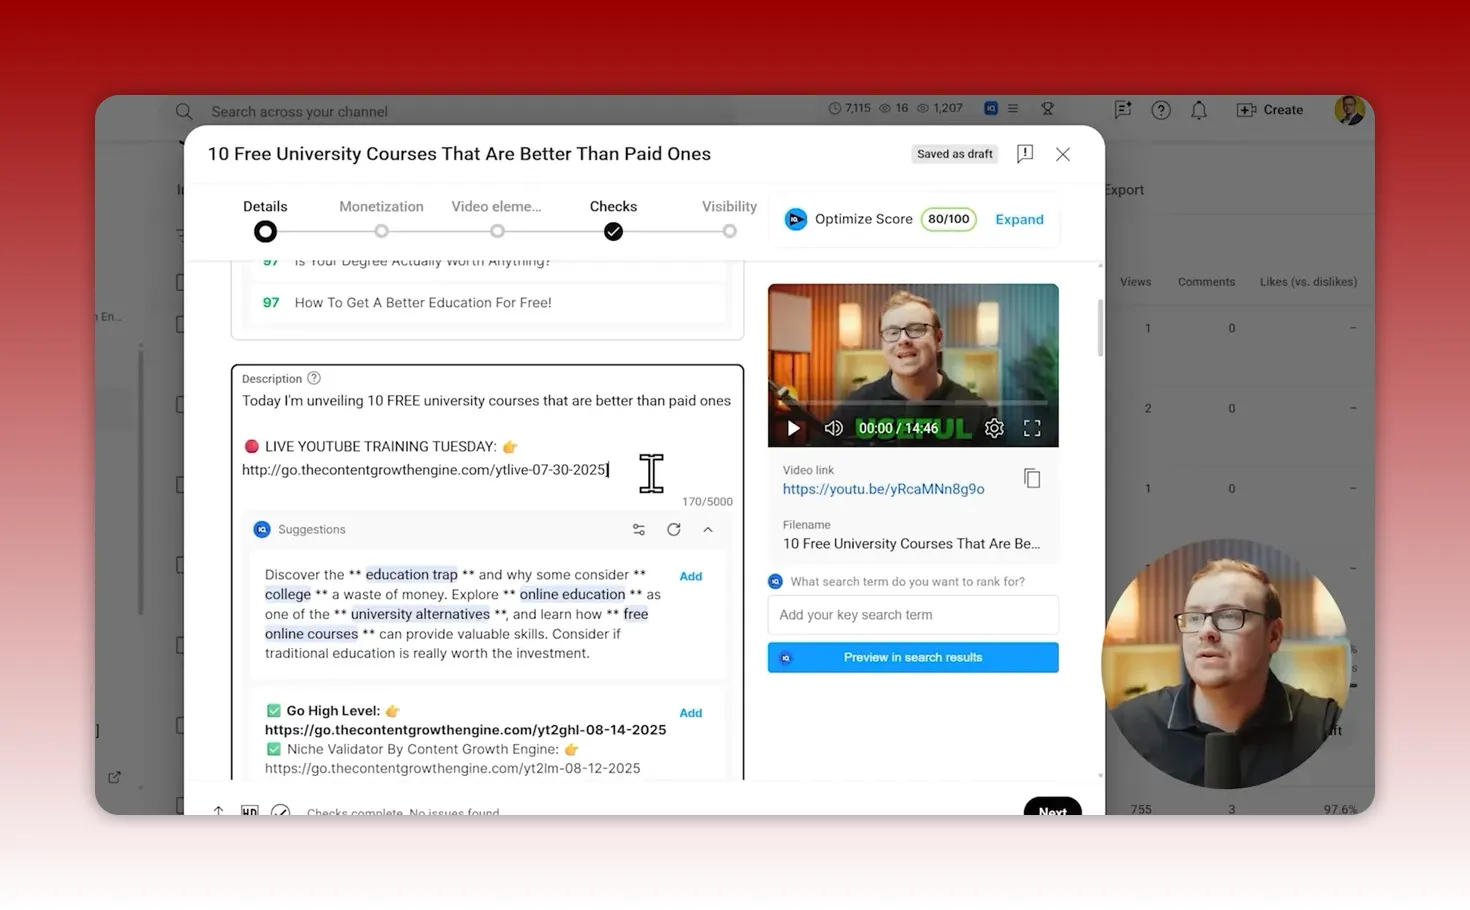
The first 1–2 lines of your description are critical. This is where you summarize the content and drop the most important link. For small businesses and nonprofits that need actions — signups, donations, registrations — put the call-to-action link in that visible zone.
Why only one link above the fold? Choice overload. When a new channel shows multiple links, people hesitate. For starting channels, present one clear action. As the organization grows, you can add multiple links for different audiences.
How to craft the top-line description
- Start with a concise sentence: what the piece covers and for whom.
- Include a few SEO keywords naturally within that sentence.
- Leave a blank line, then paste your primary UTM-tagged link so it displays above the fold.
- Optional: a small emoji that signals the link function, for example a red dot for live events.
Step 4 — UTM links: track conversions by date
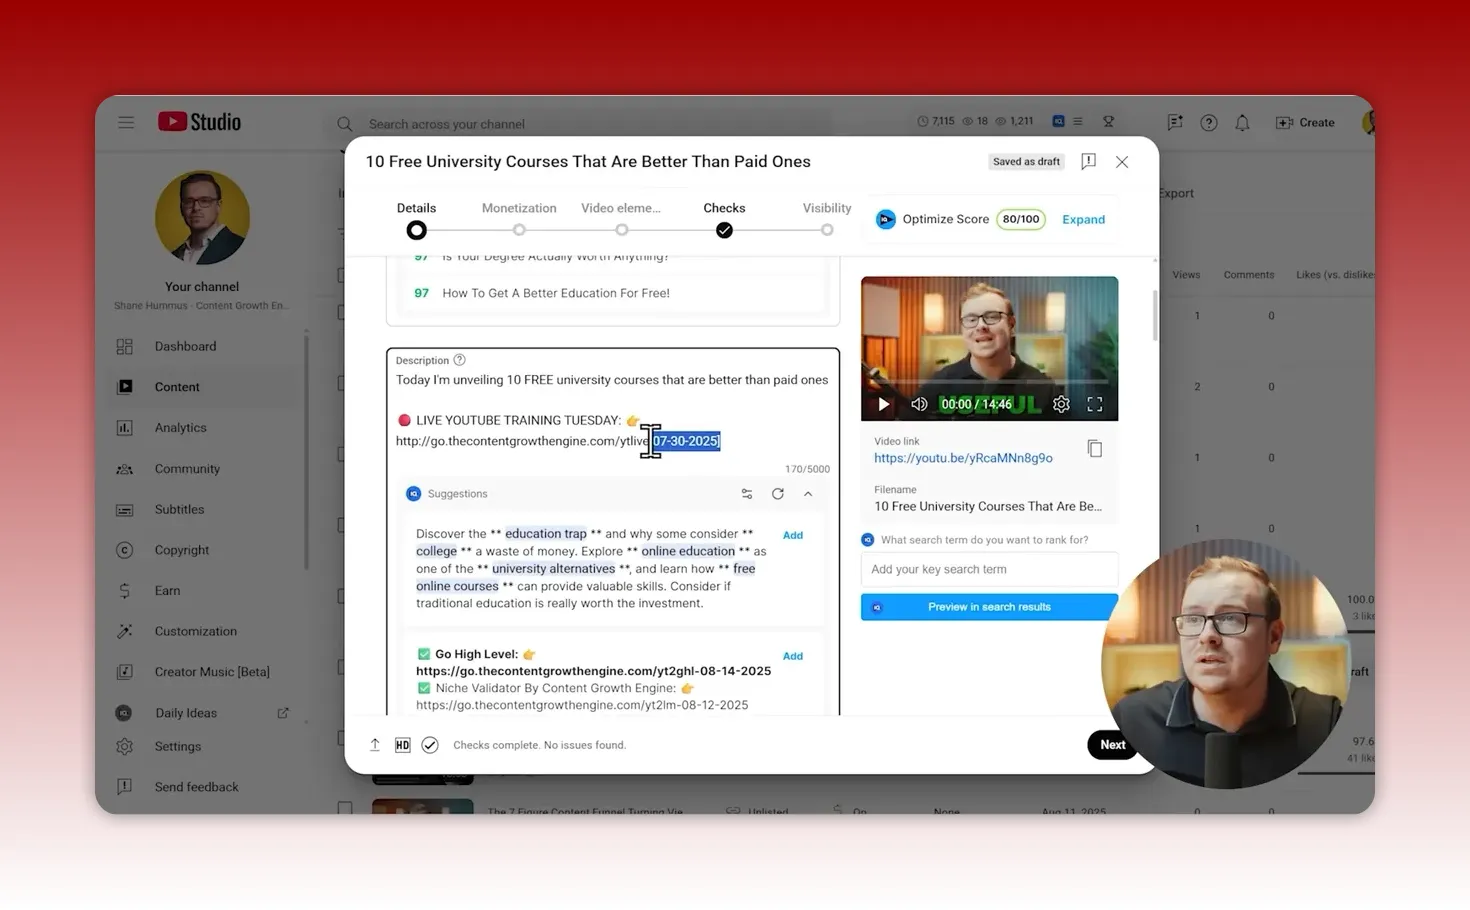
Create a UTM link for every upload that you use to measure which content brings traffic to your donation page, volunteer sign-up, or storefront. Use the publish date as the distinguishing element in the link (for example utm_campaign=2025-07-30). Shorten and manage UTMs with a reliable shortener like short.io. That makes it easy to filter conversions by date in your analytics.
Step 5 — Description details: SEO summary, timestamps, and copywriting tips
After your primary link, include a short SEO-optimized paragraph or summary. This will help the platform understand the content more quickly, especially if your channel is new.
Use AI sparingly and smartly. For many creators, a short summary generated by GPT from the transcript works well. But avoid keyword stuffing. The goal is clarity and helpful context, not repeated phrases for the sake of it.
Timestamps: use with caution
Adding timestamps can be useful for long tutorials, but they often reduce average view duration because viewers skip to the segment they want. For most small organizations, this can harm performance. If you do add timestamps, label them to create intrigue rather than reveal full content. For example label a segment as “A surprising way to double volunteer signups” instead of “Volunteer signups.”
Step 6 — Thumbnails: tools, testing, and naming
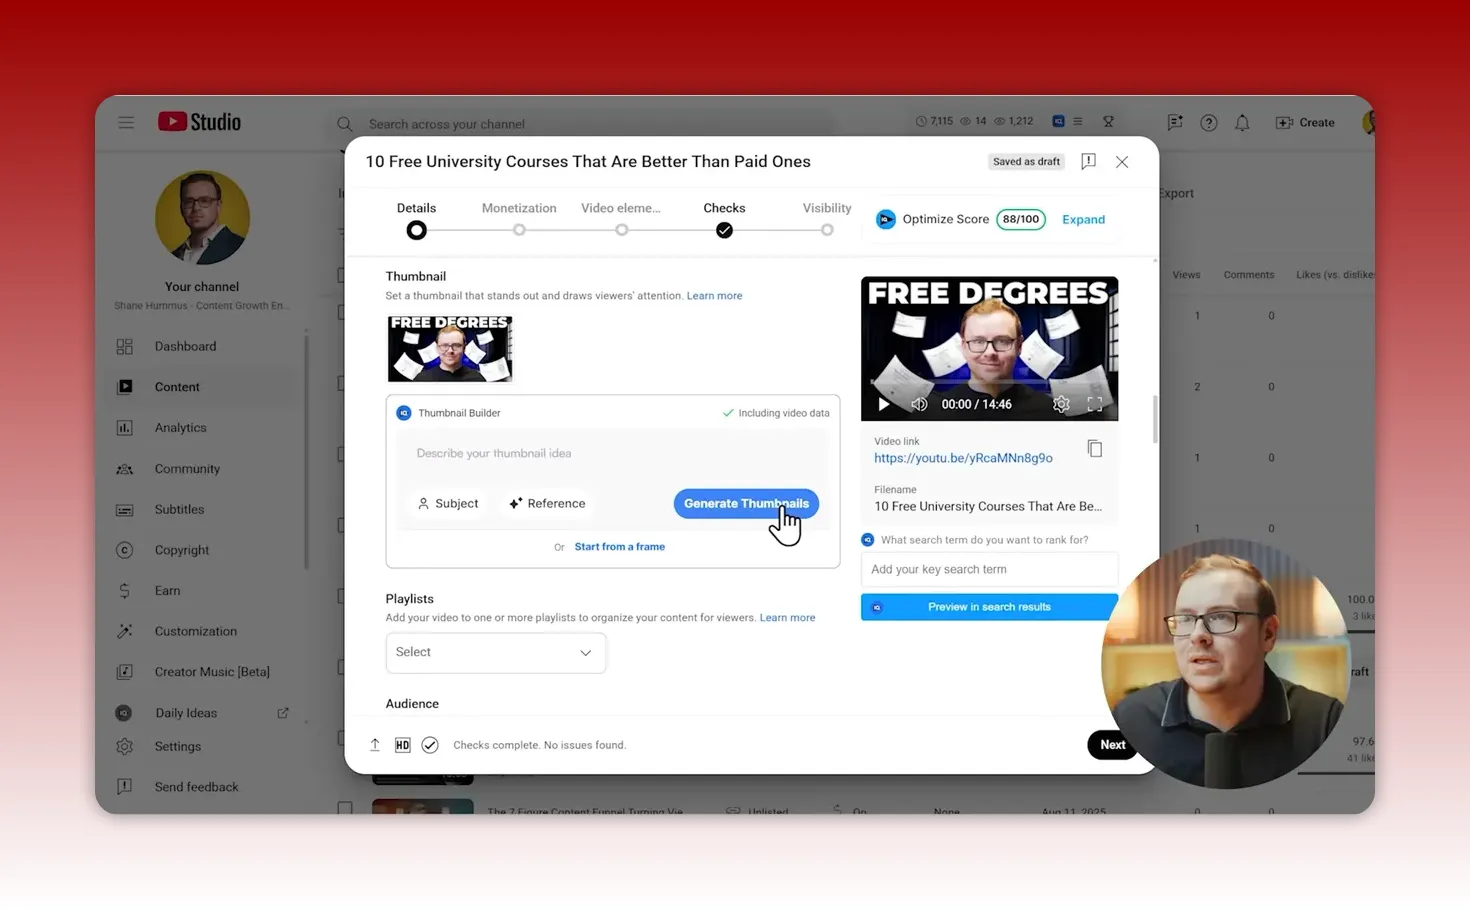
Thumbnails are still one of the biggest levers for increasing clicks. Use proven templates from your niche and test variations.
Tools
- Canva — excellent for beginners. Free and quick.
- Pixels — useful for rapid variations and modeling other creators' layouts.
- Photoshop — for advanced control and pixel-perfect work.
Name your thumbnail file the same as the title before uploading. That consistency rarely hurts and sometimes helps search visibility.
Step 7 — Playlists: get smarter reach with thoughtful grouping
Playlists increase session time because they encourage binge behavior. For small organizations, playlists can also group content around services, programs, campaigns, or donor education.
Only add videos to playlists that are genuinely related. Ask: if someone watched this, would they logically want to watch those other videos next? Usually add a video to two or three playlists maximum. Overlapping and irrelevant playlists confuse the algorithm and dilute effectiveness.
Step 8 — Audience settings: made for kids, age restrictions, and altered content
For most organizations, set “Not made for kids.” Only mark videos as made for kids if they are specifically produced for a young audience like preschool programming.
Do not age-restrict unless content truly requires it. Age restrictions limit reach and decrease monetization potential.
Altered or AI-generated content
Mark the altered content flag only if the video is majority AI-generated. If you used small amounts of AI for captions, b-roll, or a quick voice patch, you do not generally need to flag it. When in doubt, review platform guidance and examples.
Step 9 — Tags, language, captions, and categories
Tags matter less than they used to, but they still help advertisers target placements and support minor categorization. Tools like vidIQ can auto-generate tags and save time. If you use tags, fill up the available space with reasonable tags, up to the platform limit.
Set the video language to English (or your audience’s primary language) and mark caption certification as none unless special circumstances apply. Captions increase accessibility and reach — always add an accurate transcript for captions when possible.
Choose a category that matches the content. For many small nonprofits or service businesses, categories like Education, How-to, or People & Blogs work well. A more specific subcategory can help a new channel get out of the sandbox faster.
Step 10 — License and embedding
Use the standard platform license. Creative Commons may seem like free promotion, but many creators and organizations experienced spam re-uploads and malicious republishing when they used CC. Standard license with embedding enabled is the safest option. Allow embedding — it’s free marketing; academic and partner sites often embed organizational content.
Step 11 — Notifications and shorts remixing
Publish to the subscriptions feed and notify subscribers. That keeps your community engaged and helps young channels get initial traction. For short-form remixing, allowing video and audio remixing is usually helpful; it spreads your content into short-form feeds and builds brand awareness.
Step 12 — Comments moderation and community settings
Keep comments enabled and choose a moderation level that fits your capacity. For most small organizations, basic moderation with sorting by top comments is enough. Active comment threads are social proof and can increase reach.
Step 13 — Monetization and ad placement
If monetization is available, enable as many ad slots as the platform allows. That typically increases revenue without heavily impacting viewer experience. The platform now places mid-rolls smarter than before, so enable multiple ad positions when relevant.
Step 14 — End screens and cards
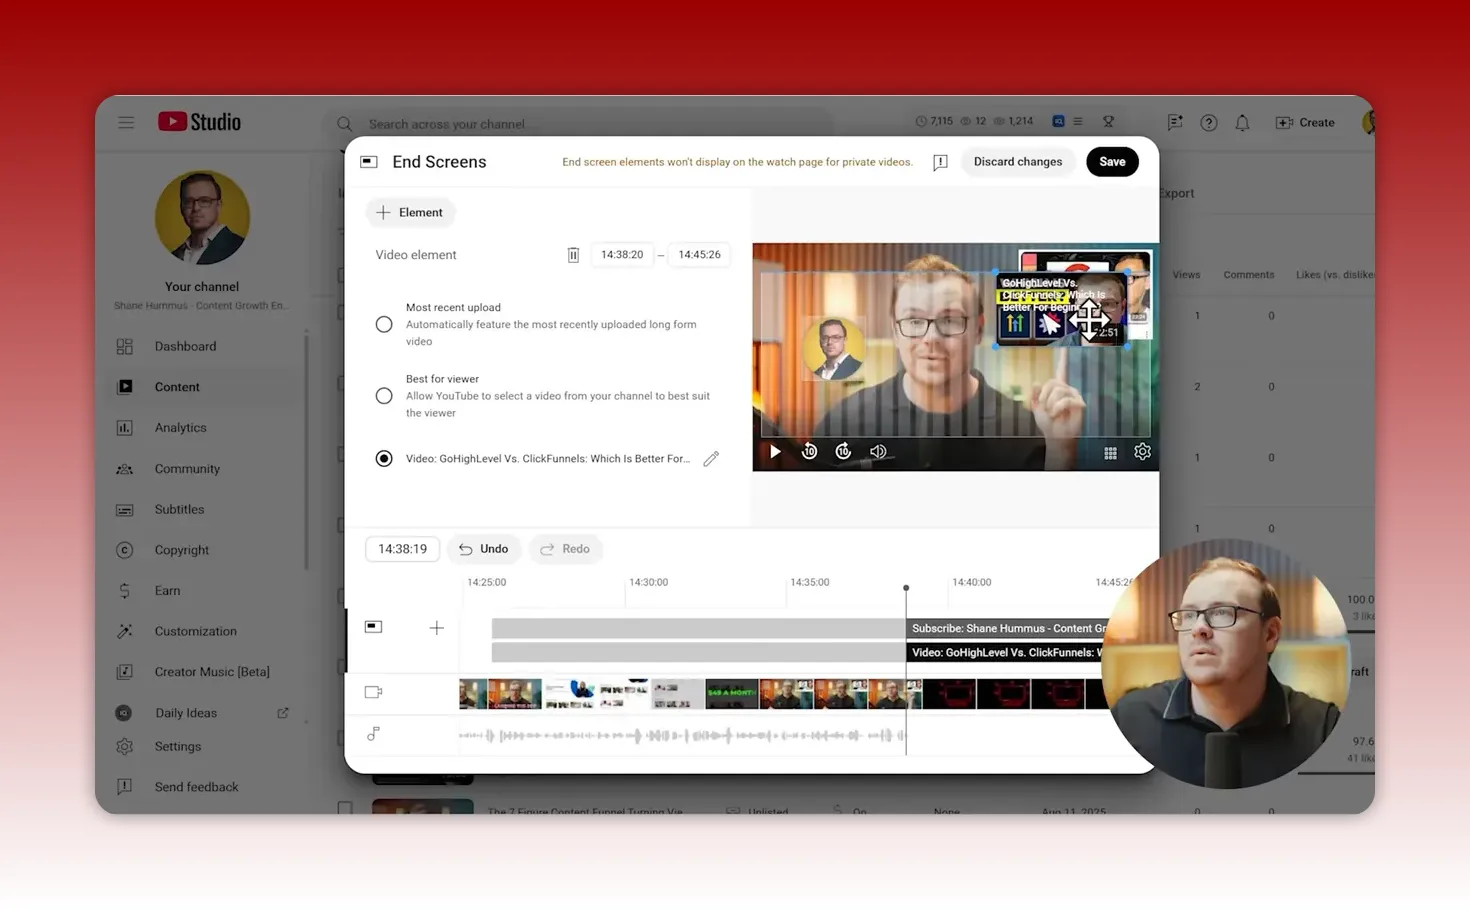
End screens are one of the highest-impact placement tools. Plan your end screen destination during scripting. Point viewers to relevant follow-up content and make it obvious visually with on-screen arrows or a countdown that tells them how long they have to click. Align the ask in the video with the end screen placement.
Cards are useful when you want to send viewers mid-watch to a high-converting video, like a testimonial or a program explainer. Use cards sparingly; too many can be distracting.
Step 15 — Publish timing and the 24–48 hour unlisted strategy
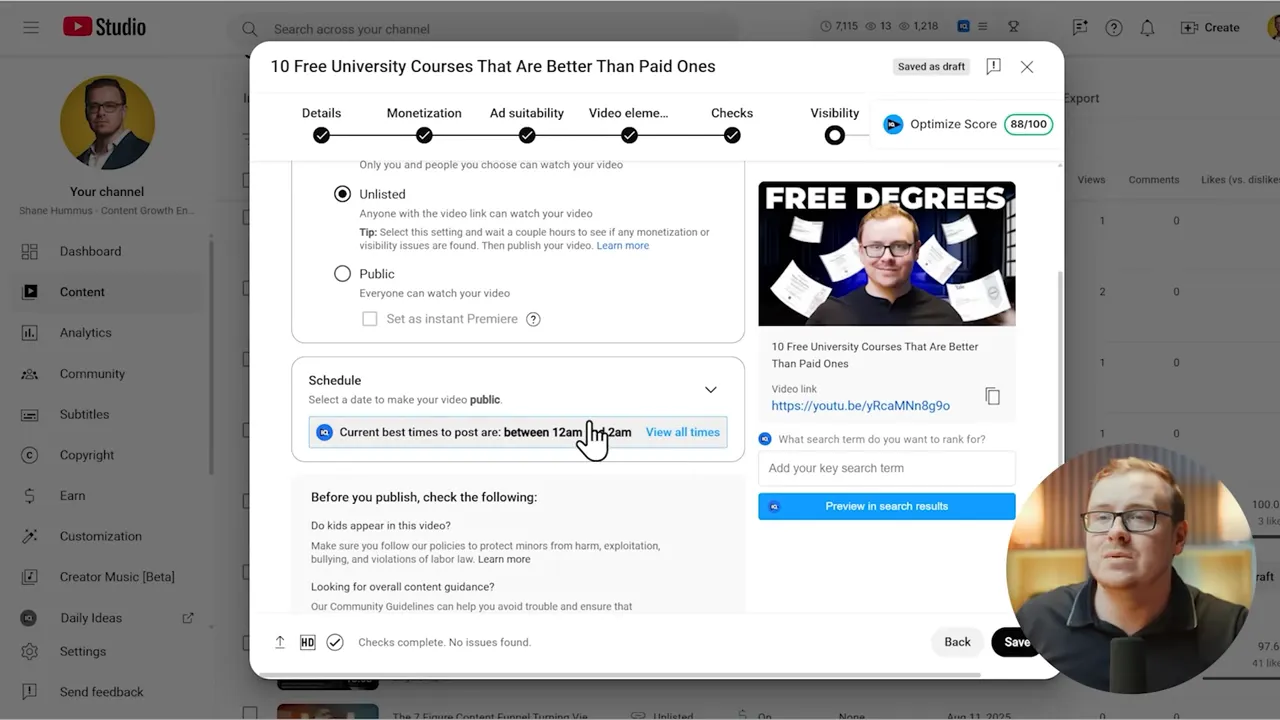
For new channels, do not publish immediately to public. Upload the video and keep it unlisted or private for 24–48 hours. This gives the platform time to analyze the content, ensures proper categorization, and reduces the chance the upload gets marked as spam during the first hours of life. For established channels this step is optional but still useful before big releases or when you want to prepare custom end screens and UTMs.
After the waiting period, schedule a publish time optimized to your audience. Tools like vidIQ suggest best times; pick the recommended window for your timezone.
Premiere vs Publish: when to create hype
Use Premiere only when you want real-time engagement, such as fundraising drives, program launches, or Q&A sessions with donors and volunteers. Premieres increase live engagement, but most evergreen content does better as a regular scheduled upload.
Step 16 — Channel trust signals and eligibility
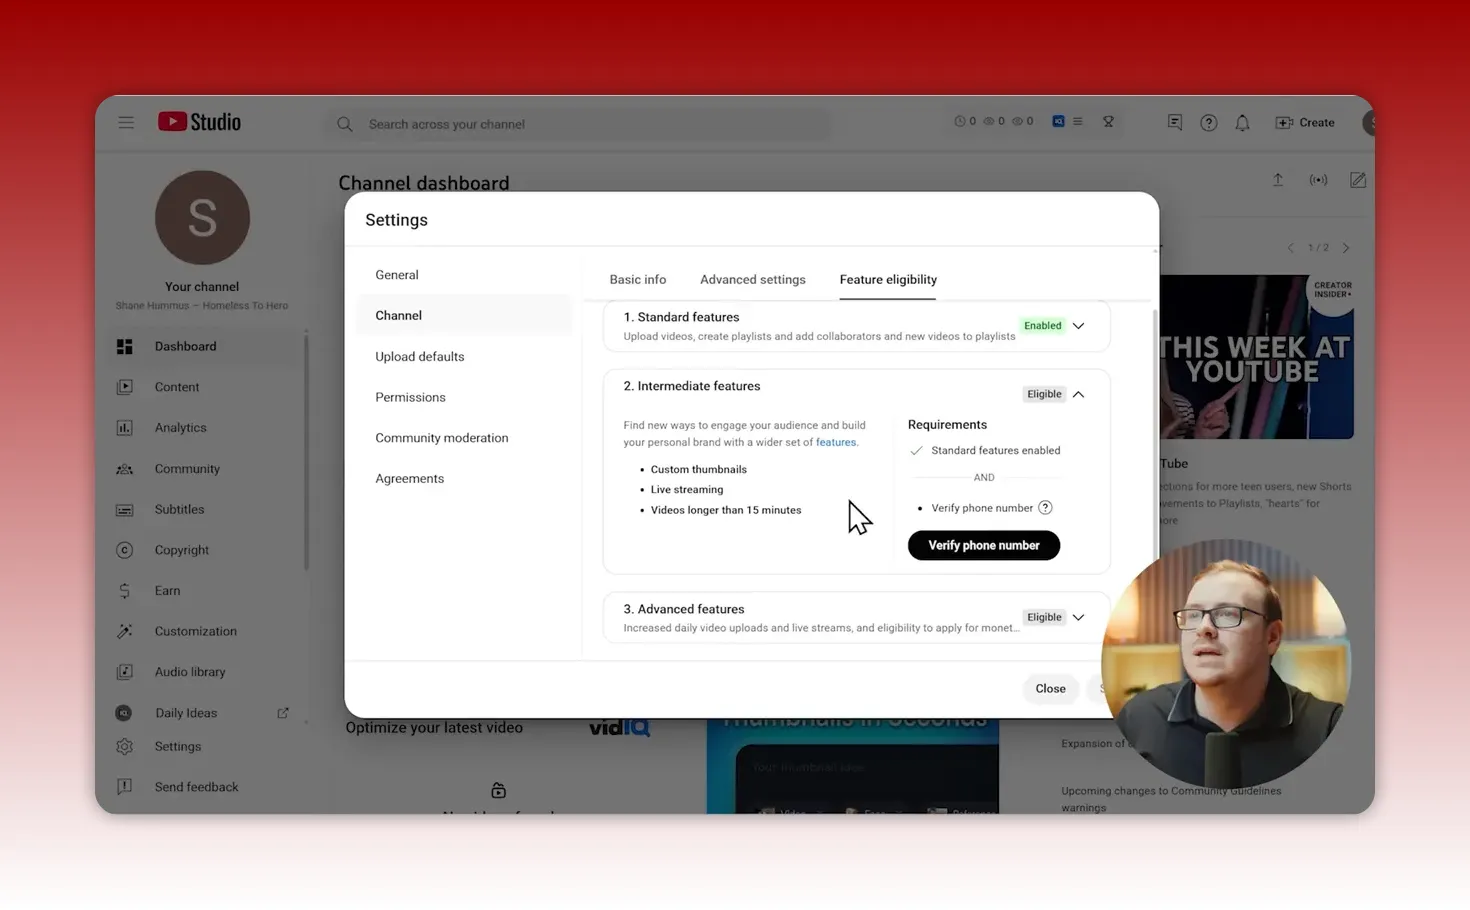
Verify your phone number and complete channel eligibility checks as soon as possible. Upload an ID if requested, enable features for the account, and connect needed billing verification. These actions help the platform trust your channel and reduce the time you spend in the sandbox where reach is limited.
Practical workflow (step-by-step)
- Finalize title. Put primary keyword in first five words.
- Save video file and thumbnail using title as filename.
- Upload file, upload thumbnail, set title on the upload screen.
- Write a short SEO-first description summary and paste your primary UTM link in the first visible lines.
- Select playlists (1–3), category, and language.
- Set audience to Not made for kids, and verify altered-content flags only if majority AI.
- Turn on embedding, set license to standard, enable notifications and shorts remixing.
- Add end screen placeholders and plan the in-video CTA so it points to that end screen.
- Choose tags (auto-generated tools are fine) and add an SEO summary paragraph.
- Save and set as unlisted/private. Wait 24–48 hours for new channels; a few hours may be fine for established channels.
- Schedule at the recommended time, or publish with Premiere only when you want live chat engagement.
- After publishing, monitor analytics and UTM conversions. Iterate on titles and thumbnails based on CTR and watch-time.
Templates you can paste into your workflow
Title template
- [Keyword] — [Value or Tease]
- Example: “Volunteer recruitment — 5 outreach messages that work”
Above-the-fold description template
Today: clear one-line summary using 1–2 keywords.
Donate / Register / Learn: https://short.link/utm-2025-08-07
End-screen CTA script line
Click the video on the right to see how we doubled volunteer signups in 30 days.
Small business and nonprofit-specific tips
- Program pages: Always use the program landing page as the primary UTM link. Track signups per upload.
- Donor attribution: Use UTM with a campaign name that includes the upload date and content theme so finance can attribute donations to specific videos.
- Volunteer pipelines: Link to a simple form and use a short thank-you page. The fewer clicks, the better.
- Sponsor transparency: If you have a sponsor for a piece of content, be transparent. While many large creators don’t toggle the paid promotion flag, nonprofits should err on the side of clarity if a corporate partner is funding the production.
- Local targeting: Use the featured places and hashtags for location-specific campaigns — great for community events and local fundraising.
Troubleshooting common problems
Views tanked after a change: Undo the recent setting change. A common pitfall is toggling an experimental feature that reduces visibility. If views drop dramatically, revert to the original settings and wait. Small channels are fragile; avoid unnecessary experiments.
Spam re-uploads: Do not use Creative Commons license and report re-uploads when they happen. Keep your content on a standard license and enable embedding only.
Low CTR: Test thumbnails and titles. Use a thumbnail test tool or run a small social media poll to pick a thumbnail that resonates.
How to measure success
Track these KPIs for each upload:
- Click-through rate (CTR) — Are people attracted to your title and thumbnail?
- Average view duration — Are people watching past the first 30–60 seconds?
- View sources — Search versus Browse versus Suggested. Ideally you want a mix.
- UTM conversions — How many signups, donations, or purchases did the upload generate?
- Engagement — Likes, shares, and comments indicate resonance and help the algorithm.
Plan for iteration
After each upload, review the analytics at 24, 48, and 72-hour marks. If CTR is low, change thumbnail and title. If average view duration is low, edit future scripts to front-load more value. The platform rewards fast improvement and consistent iteration.
Checklist you can copy before hitting Save
- Title set and keyword in first five words
- File and thumbnail named with title
- Primary UTM link visible above the fold in description
- One clear link above the fold (if new channel)
- Short SEO summary added beneath the link
- Playlists selected (1–3)
- Audience set to Not made for kids
- License Standard and embedding allowed
- End screen slots set and synchronized with in-video CTA
- Upload set to Unlisted/Private for 24–48 hours if new channel
- Schedule time chosen or Premiere selected for live hype
FAQ
How long should I keep the upload unlisted before publishing?
For brand-new channels, keep the upload unlisted or private for 24 to 48 hours to allow the platform to analyze and categorize the content properly. For established channels, a few hours can be sufficient if you need time to finalize end screens or UTM links.
Should I always use the same file name as the title?
Yes. Naming the file the same as the title and saving the thumbnail with that name helps maintain consistent metadata. It does not guarantee increased reach, but it reduces potential categorization errors and is a simple best practice.
Do tags still matter?
Tags are less influential than they used to be, but they still help with ad targeting and minor categorization. Use a tool to auto-generate sensible tags and fill available space without keyword stuffing.
When should I use Premiere?
Use Premiere for campaigns that benefit from real-time engagement: fundraising events, program launches, important interviews, or Q&A sessions where live chat interaction can increase conversion. For evergreen content, publish normally and use scheduling instead.
Can I use Creative Commons to get free promotion?
Avoid Creative Commons for organizational content. It can lead to spam re-uploads and potential misuse. Standard platform license with embedding allowed provides safer exposure without risking re-uploads or scams.
How do I track which video drove a donation or sign-up?
Use a dated UTM structure and short.io or a similar shortener. Create one UTM per publish date and drop it in the above-the-fold description area. This makes it easy to match conversions to specific uploads in analytics.
Final note
Uploading with intention turns each piece of content into a small campaign. These steps simplify the technical side and let small businesses and nonprofits focus on the strategic side: messaging, relationships, and impact. Implement this workflow, measure the results, and tweak titles and thumbnails until you find what resonates with your audience.
Consistency and small optimizations compound. One thoughtful upload after another builds trust with the platform and with your community.
This article was created based on the video The BEST Way to Upload Videos on YouTube (Settings).


